 |  |  |
 |  |  |

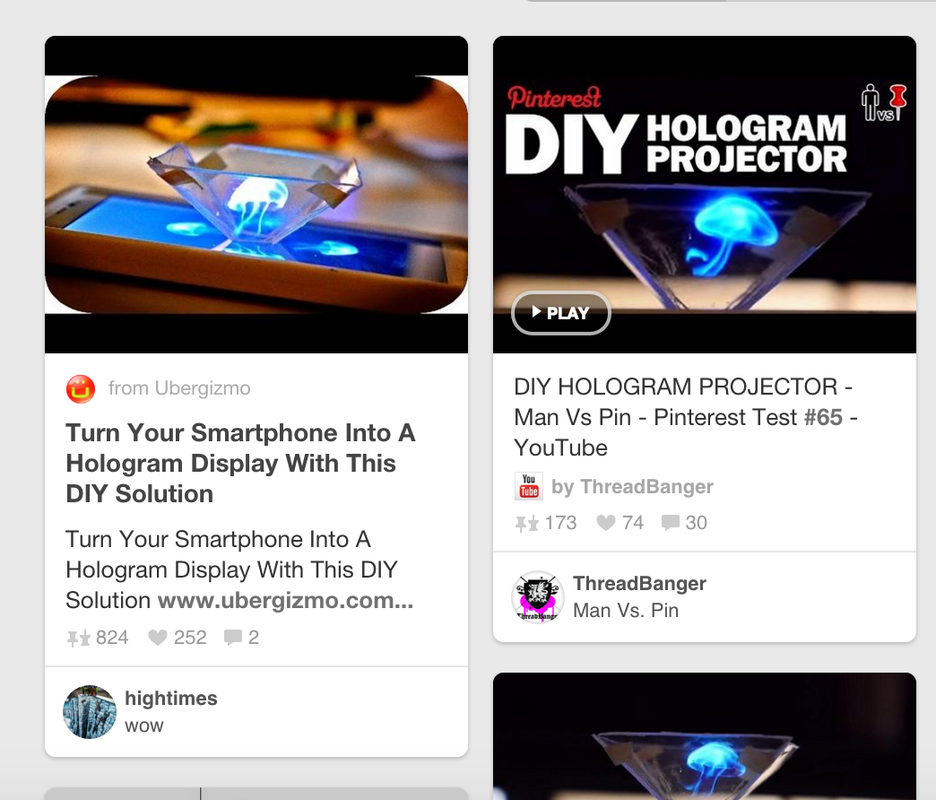
I have seen so many people do this project before and I had to try it. This weeks project is a hologram projector. You can find videos of holograms and just pop this projector on top of your phone and you have a 3d image floating above your screen.
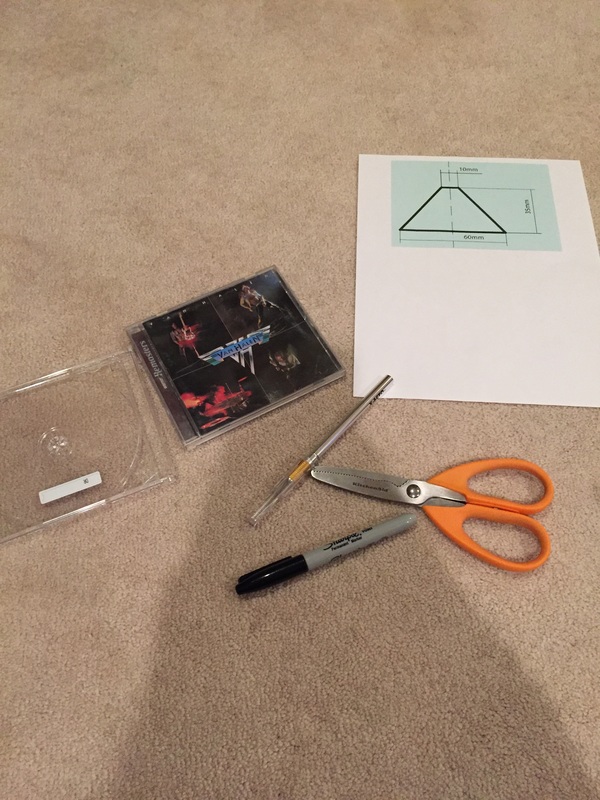
Let's get started. What you are going to need are some CD cases, a print out of the template, (which you can find here http://goo.gl/rU8xI6), a pair of scissors, and X-acto knife, and a sharpie. The first thing you want to do is to take all of the papers out of the CD cases and pop the layers apart. The next thing you want to do is to cut out you print out. Next, put the printout on top of one side of the CD case and trace the shape. Now you want to cut that out and repeat so you have four little trapezoid cut outs. This was where I got into trouble... The last thing you want to do is to tape all of the sides together to make a pyramid, and you are done!
So when I was watching other people do this video they made it seem so simple. I thought this was going to be a piece of cake. Well the first few steps were super easy until I had to start cutting out the trapezoid pieces. This part took me forever and I kept breaking or cracking or ruining the piece. I tried so many times and my best four still had cracks in them. This project took a lot longer than I expected and much more patience than I have in me. I was also left with 100+ shavings and shards of plastic all over my floor. When I was done I tried it out and I was so disappointed. My results were terrible. I could see a hologram but my projector kept falling over. I couldn't make the trapezoids even enough without breaking them. I would consider this a fail :(.
RATINGS:
Messiness: 8/10 After shaving off a million little pieces of plastic to make my final product fit together and work I was left with so much plastic on my floor.
Simplicity: 4/10 This is a very simple concept. The instructions are very easy to understand, but actually doing the steps is a whole other story. You cant cut the plastics or it will crack which will ruin the projector. You cant snap the parts off because it will break the plastic. I couldn't find a good and effective way to get the pieces separated from the plastic around it.
Fun: 2/10 This was more frustrating than anything. No part of it was fun and my final product was not worth it at all. I did not enjoy making this DIY project.
Overall: 5/10 I don't feel strongly either way. If you have time and patience I think you should go for it. Just make sure to be accurate with your measurements and cutting. I would not recommend it to people who are impatient or get annoyed easily.
Would I Do It Again: This is hard. Most likely I wont, but I might challenge myself to make one that works better and is more even and symmetrical. This project made me very frustrated so if I did it again I would do it over the course of a few days. This DIY is definitely not for everyone.
 RSS Feed
